Make a 4th of July Necklace

Pat and I have decided to have a big 4th of July party. As I was thinking through all the preparations, I realized that I didn't have any patriotic jewelry for the occasion. Obviously, there's plenty of cleaning and yard work to be done, but I halted everything to make myself a red, white, and blue necklace.

And, since I figured that there are likely loads of people without Independence Day jewelry; I filmed the process of creating a steal-the-show star necklace.
You can watch how to Make your own 4th of July Necklace on YouTube or in the above player. 

The process was easy enough. The stars were cut from thrift store cookie tins with tin snips. What took the most time in making the necklace was filing and sanding the edges of the tin. Once they were butter-smooth, holes were punched so the stars could be joined together and chain added. Easy-peasy!


Now that the necklace has been made, I just need to clean every square inch of the house, make sure everyone knows they're invited, sew some bean bags, go to the grocery store, clean and decorate the pool area, set up tables, finish yard work, buy fireworks, make side dishes, ice drinks, and all the other party prep I'm sure I haven't considered yet. But, at least I know I'll be beautifully adorned!

In fact, I like this necklace so much - we may have to have a party for every patriotic holiday! Ha.

If you have any questions about the steps I took to make this pretty little thing, please don't hesitate to let me know.

And y'all, have a safe and happy 4th of July!


Peek at my Weeks (June 10-23)

It's time to give you another inside look at some of the goings-on in my world. The last few weeks have been kinda bumpy as I went out of town for several days, and I just haven't been able to catch back up - but I'm trying!

Before heading out of town, I made sure to check the garden and nesting boxes. What a bounty!

I made sure I was caught up on both #The100DayProject and ICAD2018 before leaving. As well, I packed materials so I could work on both whilst away. However, I barely touched my supplies. Fortunately, I've been able to catch back up since I got home (over several days' time).
I decided to work with altering tin over the last few weeks to keep it simple. 

And, I got quite a few components made! Now to just turn them into jewelry!! I also recorded my making of 78-80 and hope to get those up for your enjoyment...later.

Even making the index card art (ICAD 2018 at Daisy Yellow) was difficult to get to, but I got it done.

I also recorded most of these, but will only be sharing a few of them (the more complex and most liked (by me) ones).

While picking up supplies before heading out of town, this contradiction caught my eye. Yes, Wal-Mart was advertising its commitment to American jobs right next to the self-checkout machines that are replacing American cashiers. It just bugged me. Is it just me?

One of the fun activities we participated in while I was away was the painting of a cross as taught by a talented young artist (Emily....I can't remember). I was happy to have some creativity in the mix of responsibility. 

The other fun activity was a trip to the McWane Science Center in downtown Birmingham. While the center is designed for kids (and the kids with us really enjoyed it), my mom and I had a lot of fun exploring the place. I especially liked the bubbles and the touch tank! That's my mom up there with the big bubble. 

After the fun activities, there was much formality, business, and fraternity for the Alabama Grand Assembly. Before long, it was time to head home.
This bridge (nicknamed the Dolly Parton) is one of the last major landmarks before hitting Mobile - meaning we were almost home. 

It took almost a whole day for this sweet kitty to forgive me for leaving her. 

And, it wasn't long before I was out in the yard discovering things like this cool turtle!

Being out in the yard also meant that the mosquitoes were discovering me too. I decided to try my hand at mixing up a homemade bug spray. It didn't work at first because I mixed it in one container before transferring it to the spray bottle. I think many of my oils stayed in the original container. I've since added more oils so we'll see how that works!

I taught the oldest niece how to do acrylic pour painting. These two are mine. I'm SO HAPPY with that top one. The bottom one is great, but the paint shifted in the car on the drive home. 

After almost two weeks, I was able to get back in the pool as we took a night swim. I was entranced by how pretty the lights leading out to and around the pool area looked in the dusk. Once it got dark, bats were swooping into the pool for a drink. It was awesome. 

And, then we spent the bulk of Saturday in the pool as several friends and family members dropped by to enjoy it with us. 

Oh, and the 20% off sale at my booth at Southern Antiques and Accents is still going on for a few more days. You should definitely take advantage of that!

I'm in the process of working on several videos and getting to all those jewelry components, so I hope to have more to share with you very soon.

What's going on in your corner of the world?

ICAD 2018: Cards 1-3

The beginning of this month marked the beginning of the Daisy Yellow Index-Card-A-Day (ICAD) Challenge. It's a 61-day challenge to alter index cards with mixed media art. I couldn't help but decide to try again (I didn't even make it halfway through last year). You can find all the details, prompts, and themes about the challenge on the Daisy Yellow blog.

For me, the challenge is a great way to create small art that I don't have to overthink - like I feel that I should with my jewelry-making. As I began the challenge, I also began filming my process. While I haven't recorded all of the cards I've created, I have taped a few. For now, let me share my process for the first three with you.


And, here's a detail view of each of the three of the cards from the video.
Card 1 includes ephemera, paint, stencils, a stamp, word stickers, Stabilo pencil, doodling, and inked edges.

Card 2 was made with ephemera, a stencil, gesso, ink sprays, a stamp, a phrase from a book, a paper doll, Stabilo pencil, and inked edges.

For card 3, I used an old pamphlet, a stencil, homemade alcohol spray ink, masking tape, decorative tape, a watercolor crayon, a stamp, and a pen.

I've just barely caught back up on my cards since I returned from being away, but I do hope to post some more videos and pictures of my little works of art. If you want to see more, make sure to check out #dyicad2018 on Instagram

Are you participating?

Peek at My Week: June 3-9

Another week in the books!

I made it through with seven altered objects for The 100 Day Project.
For this week, I worked through a box of miscellaneous items I had gathered at the beginning of the project to be altered. 
62: This was a tube with caps that I added some of my acrylic-poured tin inside of. It took several tries but finally worked. 
63: The flower-shaped old jewelry pieces were colored with Vintaj Patinas and riveted together. I added the faux pearl cabochon with glue. 
64: An old earring was added to a key. Simple.
65: The metal feather was colored with Vintaj patinas and a silver wax.
66: This was a gold-tone solid piece that I punched the circle out of. I also punched out a few smaller holes into which I added tube rivets after coloring the whole thing black. 
67: These were basic copper washers that were textured with a texture hammer, darkened with Novacan Black Patina, and sanded to reveal the texture. 
68: Another metal feather was colored with more Vintaj Patinas. I bent it into a cuff shape.

In addition to The 100 Day Project, I worked on Daisy Yellow's Index Card a Day.
It's been tough to get it done each day, but so rewarding to stretch my creative muscles. 

In addition to being creative, I made sure to vote in our primary election.

I've admired the zinnias that have grown from the seeds I planted.

I found a crumpled leaf in the house that looks like a heart.

And, we've had loads of afternoon rainstorms.
Fortunately, this was just a mile from my house, and I made it home before the bottom fell out.

As for some of the links I found this week:

So, that was another week. I'm not sure that this one will be as exciting as I'll be out of town for most of it, but I'll try to make the most of it. I hope you do too!!

June Challenges and Inspirations

I'm so far behind on my blog reading that I'm feeling absolutely guilty about it. If I usually comment on your blog and haven't in a few weeks, be assured that I'm trying. There's something about the summertime temps hitting and my motivation waning. I just can't seem to get and stay focused. Oh, and if I've NEVER commented on your blog (and you're a real person), please make sure to leave your blog in the comments so I can find you! Blogs are quickly becoming a thing of the past, but I'm still scrambling to follow everyone out there.

Anyway, I'm just popping in real quick to share the Challenges and Inspirations I've found for June. 

Here goes:

  • First up is Earrings Everday! The We're All Ears Inspiration this month is Kaleidoscopes with a June 15th reveal date. That's a week away!! I better get busy if I'm going to play along. 
  • Sarajo of SJ Jewelry Designs has shared the Honey Do List photo inspiration for June. It's a super cool curly palm tree frond. You'll have to see it for yourself. The reveal date is June 25th. 
  • Halcraft has a pretty palette challenge using their brand of beads (available at Michael's I believe). June's theme is Tutti-Frutti and is a pretty spectrum of colors. The deadline is June 27th. 
  • Sunflowers are the inspiration for June at Art Elements. This challenge isn't limited to jewelry-making either. Any art medium is accepted!! June 30th is the reveal.
  • You should see the inspiration painting at Art Bead Scene. It's a beauty. You do need to use an art bead in your work, but you have until the end of the month submit your design.
  • Finally, ICAD 2018 from Daisy Yellow began on the first of the month and continues every day until July 31. ICAD = Index Card a Day. There's plenty of time to catch up! She even provides daily prompts and weekly themes if you need a creative jumping point. 

That's all the ones I've found so far. The Artisans Create Together Facebook Group usually has a challenge, but it's not up yet. I'll add it to the list if/when it's live. If you know of any others I can share, please let me know!

New in the CraftyHope Etsy Shop

Much of the upcycled cookie tin jewelry I've been making is finally making its way into the CraftyHope Etsy shop. Have you seen it?

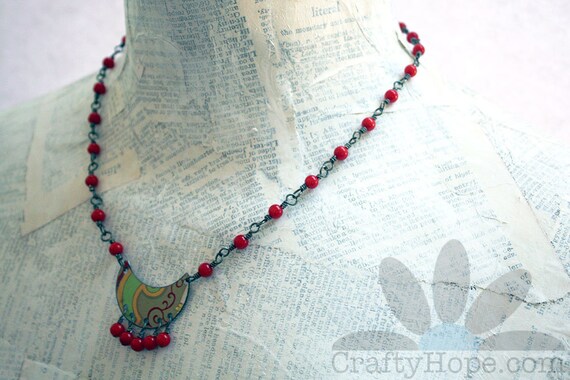
Boho Tin Fringe Necklace

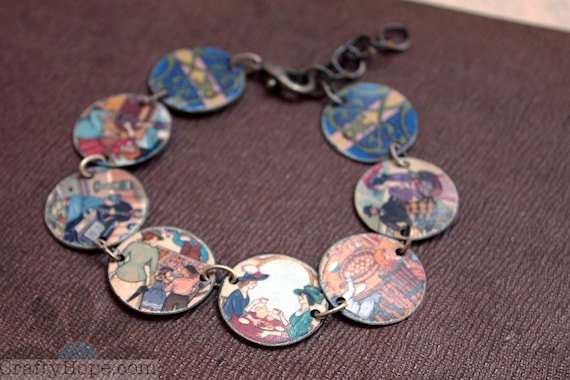
Tin People Bracelet

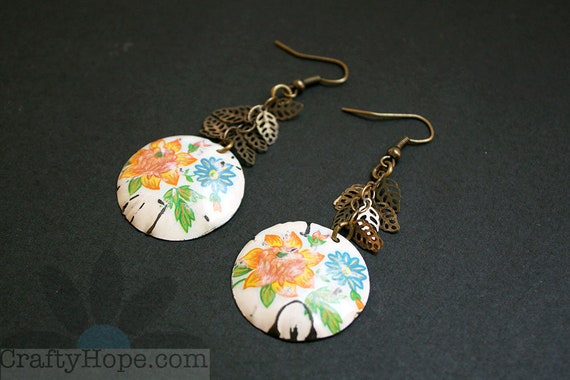
Tin Flowers with Leaf Fringe Earrings

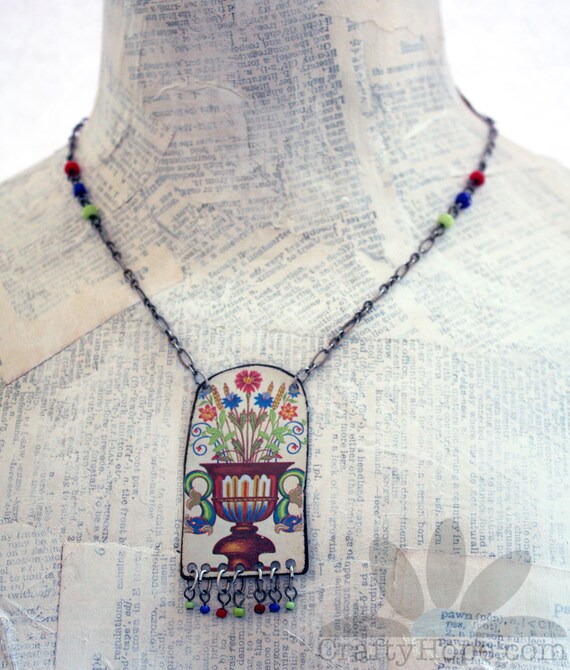
Tin Flower Bouquet Necklace

I've even added a few pieces that aren't made of tin. Ha!
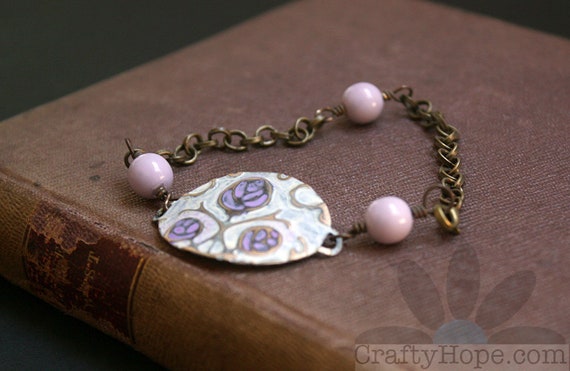
Violet Flowers Bracelet

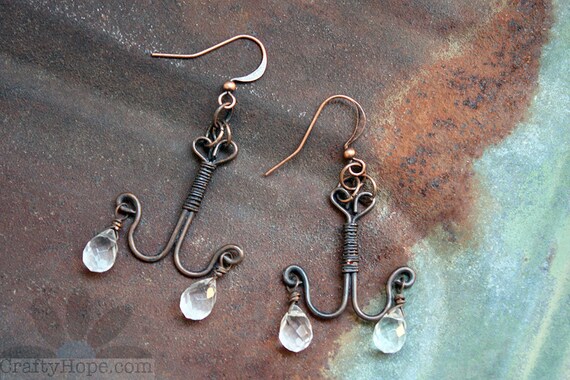
Copper Chandelier Earrings

Make sure you head over to the CraftyHope Etsy Shop to see what else is available. There are loads more. Let me know what your favorite is.

Peek at My Week: May 27-June 2

Another week, another peek!

Sunday was spent largely in the pool. My mom and niece came over and then a couple of friends. We do love our pool, and it's so nice to share it.

Throughout the week, I did quite a few more paint pourings including some experiments on different paper types. 
The first two above are on canvas board and the third on cardboard. These are all still wet. I seem to really like their vibrancy while wet. I think sealing them somehow will help bring back that vibrancy while dry.

I also tried acrylic pouring on a piece of tin. I sanded and coated the tin in gesso first to help make sure the paint would stick well. 

What did I do with all these experiments? I used many of them in my 100 Day Project for the week.
55: This was part of one I poured on posterboard. I sealed it in a bezel with a thick layer of resin. There were a few bubbles in the resin so I applied the butterfly rub-on to cover them. I also added fine glitter before sealing with another layer of resin.
56: For this one, I used a paintbrush to pick up some of the paint that had dripped off a painting. I applied the paint to the inside of the tiny bezel, let it dry, and sealed it with resin.
57: Another bezel project. This time, I peeled up some of the dried paint from the cookie sheet I was using to catch it. I cut the dried paint down and sealed it in the bezels with resin.
58: I took the rest of the painted posterboard (from day 55) and let the painting poke through as I altered it into a picture of flowers in a vase.
59: Using tin that I textured with dimpling pliers, I tried to pick up overflow paint. Once the paint dried on my tin, I cut it into a circle shape, hole punched it, and sealed it.
60: The process here was similar to the previous day but I didn't texture the tin beforehand. Instead, I waited until the paint was dry before texturing it in an embossing folder. I sanded, cut the teardrop shapes, hole-punched, and sealed the pieces.
61: I think this was my most successful of these last three attempts. This was from the large tin piece I poured the paint onto. I simply cut out the shapes, sanded the edges, and sealed them.

In addition to The 100 Day Project, I've decided to jump in on Daisy Yellow's Index Card a Day (ICAD) project. I tried juggling these two last year and had a little trouble. I can see that being the case next week when I go out of town, but I can always try to catch back up if I get off track. ICAD2018 started on June 1st and runs for 61 days (through July). Here are the two I started off with. 
There are prompts and themes that go with the ICAD project. However, there's no requirement to use them. They are just there to kickstart your inspiration if you work better that way. All the information can be found on the Daisy Yellow blog. And, you can see loads of these icads on Instagram by searching #dyicad2018. It's still early, you can totally play along and catch up!

As for what else my week held...
There were animal shenanigans. Leeloo's still obsessed with paper. Right now all our toilet paper is under lock and key. Sigh. I caught Zoe with the ball in her mouth. It tickled me so much. And, there's Leeloo herself attempting to climb the window. Ha!

My mom's plumeria bloomed into this majesty. So beautiful!

Oh, and I'm having a sale in my booth at Southern Antiques and Accents in Fairhope. It's 20% off everything in the booth for the whole month! If you're in town, go check it out!!

I mentioned last week that I was going to also share some of the links I find. Here's what I found interesting this week.


I hope your week is going well!

Jewelry-Making for Beginners Part 9: Using Crimp Beads

Learning to make jewelry is as simple as knowing a few of the tools and how to perform several techniques. From there, a whole world of design opportunities lies before you. In this Jewelry-Making for Beginners Series, I've already covered quite a bit of information and several techniques.

Information:
Beads
Other Supplies

Techniques:
Opening and Closing a Jump Ring
Making a Simple Loop
Making a Wrapped Loop

Today, we'll focus on working with crimp beads.

In reality, this section could also be referred to as "working with beading wire" as these two materials go hand in hand. Crimp beads are used to secure the ends of beading wire or other thin material (like fishing line/monofilament) so that your beads don't just slide off.

The tools and materials are very simple.

You'll need beading wire, beads, crimping pliers, and crimp beads.
There are quite a variety of crimp beads on the market - some larger for larger gauges of wire, some in tube form, some with lines along the side, etc. But, they all work in the same manner.

To begin, you'll slide your crimp bead onto the end of your wire, threading the wire's end back through the bead to form a loop.

Make sure you leave a bit of a tail on the wire to help doubly secure your jewelry. You can make the loop of your wire as large or as small as you want by re-positioning the bead.

From there, pick up your crimping pliers and take a good look at them.

You should be able to see two sets of notches in the jaws of the pliers. The set in the front (#1, above in red) are just two basic curves in the jaws. They are used to smash your crimp beads. The set in the back (#2, above in blue) has one simple curve (top jaw) and one curve with a small raised portion in the middle (bottom jaw). This set is used to put a bend in your crimp bead.

To use the crimping pliers on your crimp bead, place the crimp bead (on the beading wire) between the first set of notches and squeeze the pliers together so the bead distorts into more of an oval shape.
You don't want to squeeze so hard that the crimp bead smashes completely.

Open the pliers' jaws slightly and move the crimp bead directly back to the second set of notches. Squeeze the pliers shut again so that the bead is folded slightly.
The raised portion of the notch does most of the work for you.

Again, open the jaws of the pliers slightly while holding the beading wire. Turn your crimp bead 90 degrees, place it back in the first set of notches, and squeeze to flatten the fold.
Be careful to not squeeze too hard as your bead could fall apart from overworking it. I speak from experience.  This technique, as with all of them, may require some practice. So, don't get frustrated.

Here's what your correctly crimped bead on beading wire should look like.

From here, you would add your beads, making sure they cover the tail also. Once your beads are all added, you would repeat the crimping process on the other end of the beading wire.

I created a video of the process of crimping a bead if you'd rather watch how it's done.


In addition, if you don't have crimping pliers, you can still use crimp beads by simply flattening the crimp bead on your beading wire with chain-nose pliers.
It's a simple process, it just doesn't have that added strength of a folded-over crimp bead.

Here are a few examples of how you would use a crimp bead in your jewelry-making. The crimp beads are circled in red.
On the left, crimp beads have been used in a necklace (a bracelet would also work) to complete the necklace before the clasp is added. At the bottom, crimp beads are used to create a floating bead by sandwiching a bead between two crimped beads. This technique is often done on fishing line to enhance the "floating" illusion. On the top right, crimp beads are used on a short length of beading wire to create a link that can be connected to another element. I've also seen jewelry artists use crimp beads on beading wire without creating the loop. However, I prefer the doubling up for extra strength. It's simply a personal preference. I encourage you to try out and experiment with this technique to find out what you prefer.

As always, please don't hesitate to let me know if you have any questions, comments, or additional information about using crimp beads.

As an Amazon Associate, I earn from qualifying purchases.

Winding down the 100DayProject

I awoke the other day with many thoughts about the 100 Day project and decided to jot them down here to share with you. Some of the bits I g...