A few weeks back, Jenny from Wonder and Whimsy posted that Fire Mountain Gems was having a super sale on randomly selected bead strand mixes, basically grab bags of bead strands. I was just barely able to order before time ran out on the sale. I went for two 5-strand mixes and one 3-strand mix of gemstones. I loved the anticipation of the surprise beads.
My stone-identification-ability is quite rusty as of late, but let's see... The first mixed set I opened included a strand of square tube tiger eye beads, small round labradorite beads, and three strands of what I think is garnet.
The second 5-strand set was somewhat similar to the first with two strands of tiger eye, two strands of garnet, and a strand of labradorite.
Finally, the 3-strand mix left me a little baffled. I'm pretty sure the middle strand is rose quartz but just can't figure out the other two. I think the left one MAY be a yellow agate of some sort but am not sure. And, I have no idea about the one on the right. Let me know if you have any ideas what they are.
While I may not have been able to identify all the beads I received, I'm smitten with the mix of them.
Beauties just as they are!
However, the challenge that Jenny set out was to create something with the random mix. Even if you didn't order one of these sets, she put forth the challenge to use some of your own random beads.
I started by pairing the tiger eye and yellow agate(?) with gold tone beads and black cultured sea glass beads.
This bracelet came together pretty quickly.
What to make next was a harder decision. There were still so many beautiful gemstones in the mix.
As you can tell from the above photo, I decided to use a skeleton key as the focal.
Alas, I haven't finished the necklace, but you can kinda see the direction I'm headed.
It's going to be a fairly long necklace so I've still got a bit of work to do.
Thanks so much to Jenny for the heads up about the great sale and for issuing a fun challenge. Jump over to her blog, Wonder and Whimsy, to see what she received from Fire Mountain, what she made, and what else she has up her sleeve.
August Challenge from Wonder and Whimsy - my reveal
 I’m a jewelry-artist, treasure hunter, & nature-lover that finds joy in the smallest things. I hope to spread that joy and inspiration.
Our New Home - one year later
Yesterday, Facebook reminded me that it's been one year since I painted the craft room. Wow! We've been here just over a year. From the start, I had hoped to share with you the changes we've made. However, I really haven't done a very good of a job of that. Oops! In reality, it doesn't even look like we've done all that much, but I assure you we have worked our butts off. Since we've hit the one year mark, I suppose it's time to show you where we're at now. Let's start like we did last time, with what you see when you walk in the door.
Besides the addition of real furniture, we painted the room a slightly deeper shade of yellow. We tried scraping the popcorn ceiling, but it's absolutely cured on there. We're going to panel it eventually anyway so not much has changed.
From the sunroom, you can walk right into our bedroom.
This is the room that has seen the most drastic changes so I've got quite a few pictures to share. From this angle, you can see the bulk of the renovations: walls painted, ceiling scraped and painted, and light fixture/fan changed.
The fake shelf is now gone. It had to be sanded off. And, the blue is more more soothing and more our style than the previous wall treatment.
The red brick just didn't go well with the blue paint. The white is so much better.
Here are some pictures from the 'during' process of this room.
Scraping the ceiling was a seriously difficult task. We had a hard time removing all of it. However, the flat paint we put over it takes away from it some. Now it just looks like we have a slightly textured ceiling.
This brick wall used to be the original exterior of the house. Painting brick is also no easy task, getting into all those nooks and crannies is a real pain!
Here you can see the faux shelf sanded and ready for painting,
While all that work went into the bedroom, there are still a few decorative things to be done. However, it's still the most complete room in the house.
From the bedroom, you can walk right into my Craft Room.
It looks so much bigger in the before picture. Alas, it is a tiny room. Hence, the DISASTER! One day I'll get it all organized and pretty, but for now I just want it to be functional.
Pat's office is similar.
It's loaded down with so much stuff but not all of it.
Our front room. . .formal living room. . .foyer room - whatever that room is, we call it the box room because of this.
Everything we haven't unpacked and everything we don't have a place for and everything we're not sure we want to keep is in this room. Fortunately, we don't use the front door so this room is kinda out of sight and out of mind. It's mostly books and knick-knacks. . .mostly.
The last room with some real change to it is the living room.
Like the bedroom, there are still a few decorating things to be done (like add a rug, change the overhead light/fan, and add some other lighting). The gray walls are an upgrade to the weird peacy-tan ones. For the most part we are happy with this room, especially since we added the new couch.
One of the main things I still want done at the house is to take out the large wall above. There's a wall in the kitchen that needs to go too. Opening up those two walls will make the living room, kitchen, and front room one large room. Oh, and the wall unit in the first picture above is the same one we used to make our custom TV stand.
I didn't show you any of the bathrooms, the guest room, or the kitchen because we haven't started in earnest on any of them. Of course, I'm anxious to tackle it all, but need to try to exert some patience for our sanity as well as our pocketbook.
I could show you pictures of the pool and property as well. But, in looking back at the pictures I shared in October - not much has changed. . .at least, not much that anyone else but us would notice. In fact, we've spent the majority of our time and money working on outside projects. We've had a few trees taken down. We replaced the roofs on the two main out-buildings. And, we've cleared out some of the overgrowth and trash on the property. But, in pictures, it looks a lot like it did last year.
Both inside and out there's a ton of more improvements and changes to be made. I try to remind myself that it will take time and money to get these tasks done. And, since this is our 'forever home', we've got the time. Now to figure out the rest.
Anyway, that's the bulk of it. Pat and I are actually hoping to start filming some of the improvements and projects we have going on around here before too long. I'll let you know when that all goes down. For now, we'll just keep chugging along. Thanks for all the questions, support, and interest we've had in the place since we moved. We are indeed loving it out here. And, I'll try to do better about sharing the changes. If y'all are still interested. . .
Labels:
decorating,
house tour,
new home,
new house,
renovations,
silverlox
 I’m a jewelry-artist, treasure hunter, & nature-lover that finds joy in the smallest things. I hope to spread that joy and inspiration.
Dollar Tree Altered Playing Card Self-Challenge
The other day I had a ton of errands to run with/for my nieces. However, I knew there would be some lag time between a few of them that I wanted to use to work on my altered playing cards. I considered lugging a bunch of supplies with me, but that just didn't sound appealing at all. As well, I knew I had a few items to pick up at the Dollar Tree. So, I decided to challenge myself to create at least one playing card with supplies I got there. Here are the supplies I grabbed.
Left to Right: glue stick, paint, stickers, paint brushes, scissors, permanent markers, and a cute kids' activity book.
I did have a few of my gesso-ed playing cards with me, and let myself use items that were laying around my mom's house (where I waited between errands).
I used a yellow legal pad that was there as my underpaper.
To start, I painted the card.
However, I wasn't happy with the brush strokes from the stiff paintbrushes and decided to go another route.
From out of the paper recycling I pulled a piece of newspaper - the game section. Using the glue stick, I stuck the find-a-word onto my card and trimmed the edges with the scissors.
While I probably could have left out showing you the original painting of the card, I wanted to illustrate that it's okay and even easy to start over on a project like this - cover oopsies with paper, gesso over them, whatever. You don't have to keep something you're not happy with.
Since it was the brush strokes that bothered me in the first go-round, I decided to use my finger to rub the paint onto the card this time.
My palette of dark blue, green, and orange worked out perfectly. I had no direction, I was just putting paint down as it spoke to me.
From there, I used the permanent markers to make random marks on the card.
Dots, dashes, arcs, and circles were formed with orange and brown markers.
There were some really cute images in the activity book I bought. However, the colors just didn't seem to mesh with the color palette on the card. Instead, I turned to the stickers for a focal image.
This "Love" sticker was perfect. However, the blotches of color on it blended in almost too well with the blotches of color on the card.
I fixed that with a black marker, outlining the sticker to separate it.
The black marker was also used to outline the whole card and make it pop.
I think working with just a few supplies can sometimes inspire me more than having a whole craft room full of options. As well, this just goes to show you that it doesn't have to cost you a bundle to make some fun art.
I love being frugal and finding supplies for only a buck. Do you have any favorite craft supplies from the dollar store?
Labels:
altered,
challenge,
craft supplies,
frugal,
mixed media,
papercraft
 I’m a jewelry-artist, treasure hunter, & nature-lover that finds joy in the smallest things. I hope to spread that joy and inspiration.
Summery Jewelry in the Etsy Shop
There's just something about a bright pop of color that screams of summer. These earrings display that well.
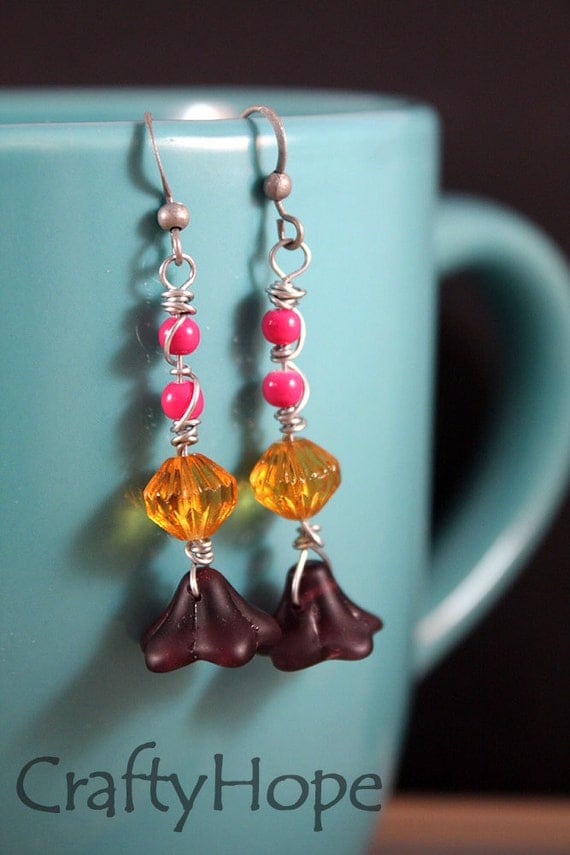 |
| Bright Blooms Earrings |
While the color in this bracelet is a bit more subdued, there's still lots of it. The blue is beachy and the sparkle is reminiscent of the sun glinting off the waves.
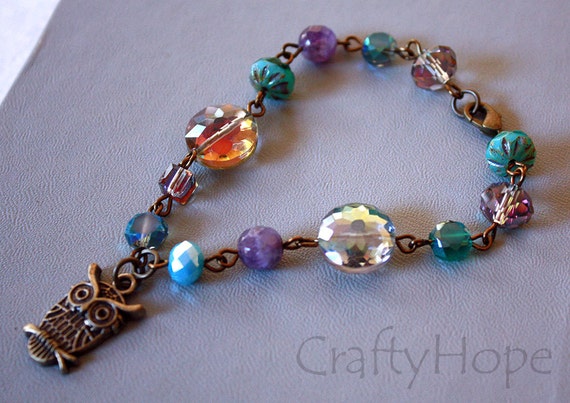 |
| Crystal Owl Bracelet |
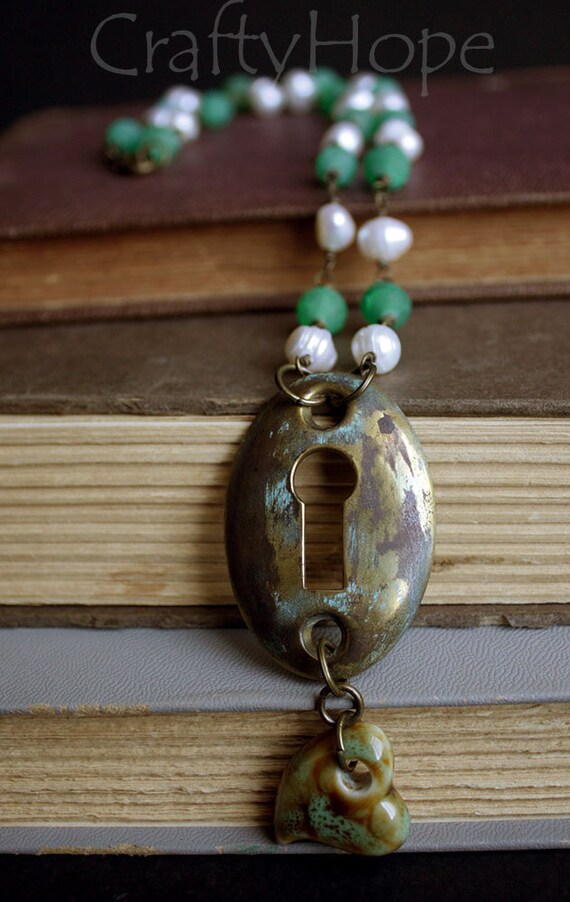
Something about the rustic-ness of this necklace hints of autumn, but the blue-green and pearly white highlights look like frothy surf.
| Blue Green Brass Keyhole necklace |
You saw these bracelets in my ZnetShows Creative Spark reveal. I could see the argument that they are more winter-related. However, sea glass will always bring it back around to summertime.
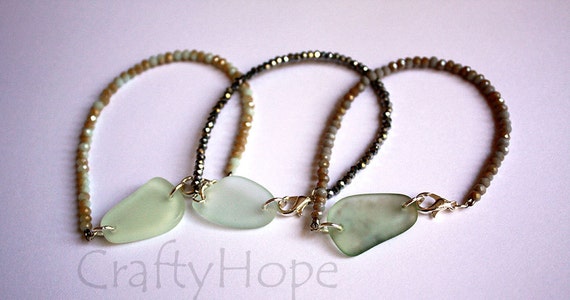 |
| Matte and Sparkle Triple Bracelet Set |
Again, I can see this one as perfect for Winter, but the lightness and airy-ness of it gives off a summery vibe.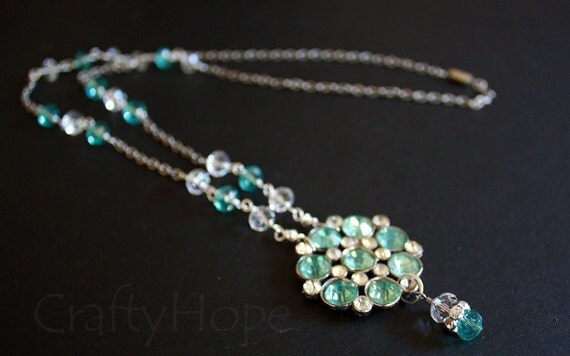 |
| Aqua Flower Brooch Necklace |
Lastly, the quirky and bright nature of these earrings are a fun little pop of summer. Of course, I see them transitioning well into the Fall with the rusty found objects in them.
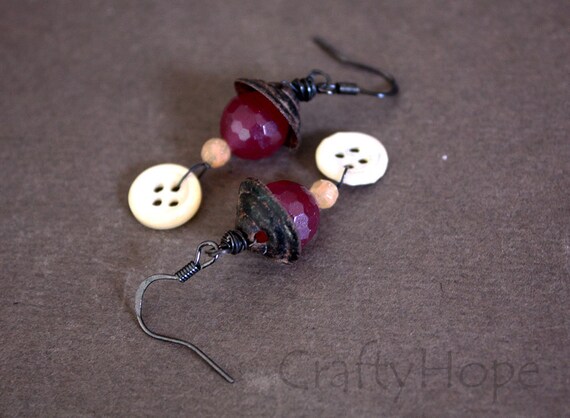 |
| Rusty Plum and Button Earrings |
Of course, there's more in the shop and more coming. I'll be transitioning to more fall-inspired accessories before too long. What do you look for in seasonal accessories?
 I’m a jewelry-artist, treasure hunter, & nature-lover that finds joy in the smallest things. I hope to spread that joy and inspiration.
Friday Finds #12: Thrift Store Hauls and Oddities
I've been able to do a little thrifting this week and figured I might as well share!
It all started on Saturday at Southern Antiques and Accents. Every month or so they have a "Dollar Day" where booths have items marked for only a buck. I love this kind of sale because most likely the items at this price are likely to be small things that I can include in my jewelry and art. While I only spent $5 this month, I came away with some real treasures.
My first finds were these metal hardware pieces. I already have a couple of the rings from the last Dollar Day, but it couldn't hurt to pick up this one too. I'm not sure what I'll do with the handle. However, rest assured that I'll come up with something.
While there was plenty of jewelry marked at the sale price, I tried to stay selective and only came away with these two pairs of earrings.
Lastly, this unassuming set of cards caught my eye. Two decks for a dollar sounded good to me. But there was more to this than I thought.
While I was expecting the cards to have the palaces from the box on the front of them, these are the cards I found inside. Interesting.
The cards themselves are a little ragged. But the face cards. . .
Now, these are VERY interesting.
I haven't flipped thorough both desks yet to see if there's anything else peculiar about them, but I'm happy with this Dollar Day purchase for sure.
This is the marking on the back of the deck. Searches so far haven't yielded any information about them though. Let me know if you have some other resource.
Once Saturday's Dollar Day shopping was complete, I thought I was good for the week. But, the thrifting bug bit again on Tuesday. So, out I headed.
My first stop was a large, local charity shop. There, I found a belt that might be fun to make a bracelet or two out of, a German (I think) children's book, and a baggie of yarn and some plastic canvas. I'll use the canvas as a stencil/texture in my art.
Next was the Salvation Army. I haven't had much luck there lately, but did happen upon this book. I've been wanting to read Alabama Moon for a while - even before I knew it was written by a local guy that my husband kinda knows. For 75 cents, I couldn't walk away without it.
After that, I hit up one of my favorite antique malls. In the same booth, I found both these tiny shakers and the jar of jewelry. Obviously they came home with me.
Finally, I hit up a thrift store I'd only been in one other time. I thought I was going to leave with nothing, but finally stumbled across these goodies: another deck of cards, a roll of rectangular stickers, a tiny shelf, and an old baking powder tin. I don't quite know what I'll do with the last two, but I'll work it out.
While I was in said shop, these . . .oddities caught my eye.
First up was this Super Road Whiz. I guess this is what people used after maps and before GPS-es. Weird. . .
Just the words Telephone Listener caught my attention. From what I can tell, it was just a speaker phone. Perhaps this was before they had the term "speaker phone". However, I can't believe that 'telephone listener' was the best name they could come up with for this device.
Finally, this baby caught my eye.
I had a Furby back in the day, and we have no idea what happened to her. Her name was Tallulah. At least that's what she told us it was as she repeated it over and over in the creepiest, slow, cutesy robotic voice ever, "Taaaaa-loooooooo-laaaaa." Like I said though, we're still not sure where she is, but we're positive she's plotting world domination. I had to bring this photo home to Pat, just to freak him out some.
Anyway, that's been my thrifting experience of late. Have you found anything worth bringing home or an oddity that bewildered you?
Labels:
book,
found objects,
friday finds,
thrift scores,
thrifting,
weird
 I’m a jewelry-artist, treasure hunter, & nature-lover that finds joy in the smallest things. I hope to spread that joy and inspiration.
Another Set of Altered Playing Cards (Dec 2015)
I made and swapped some altered playing cards back in December. I even recorded the process and took pictures of the results. Then, I promptly pushed that digital file aside. It's way past time to share these with you, especially since I finally uploaded the process videos.
Above are the six cards I sent my swap partner.
I split the process video into two to try to keep the videos a little shorter. In the first video, I made these three cards.
You can watch Altered Playing Cards Part 1 below or click over to YouTube.
And, here's another look at the cards.
Here are the three cards I made in part two.
Again, you can watch Altered Playing Cards Part 2 below or at YouTube,
A closer look at these also.
Watching the videos should fill in any questions you have about how I made these cards. But, if they don't, please let me know!
You can see previous cards I created as well in other blog posts.
My first Motivational Altered Playing Cards (two sets of cards)
August's Altered Playing Cards (in November)
Altered Playing Cards for October (In January)
November Altered Playing Cards (in March)
Labels:
altered,
art,
craft project,
mixed media,
my video,
swap
 I’m a jewelry-artist, treasure hunter, & nature-lover that finds joy in the smallest things. I hope to spread that joy and inspiration.
Subscribe to:
Comments (Atom)
Jewelry Trunk Show at Hello Gallery in Fairhope
I've been invited to participate in a trunk show with several other artists at Hello Gallery . You'll find me and a variety of other...

-
Learning to make jewelry is as simple as knowing a few of the tools and how to perform several techniques. From there, a whole world of des...
-
I awoke the other day with many thoughts about the 100 Day project and decided to jot them down here to share with you. Some of the bits I g...


